
Dealing with Insurance Companies – Post Disaster Tips
When disaster strikes, the last thing you want to worry about is navigating the complex world of insurance claims. It can feel like you're trying to decipher a foreign language while standing in the middle of a storm. But fear not! This article provides essential strategies for navigating the often complex interactions with insurance companies after a disaster, ensuring you receive the compensation and support you deserve. Think of it as your roadmap through the chaos, guiding you step-by-step to a successful resolution.
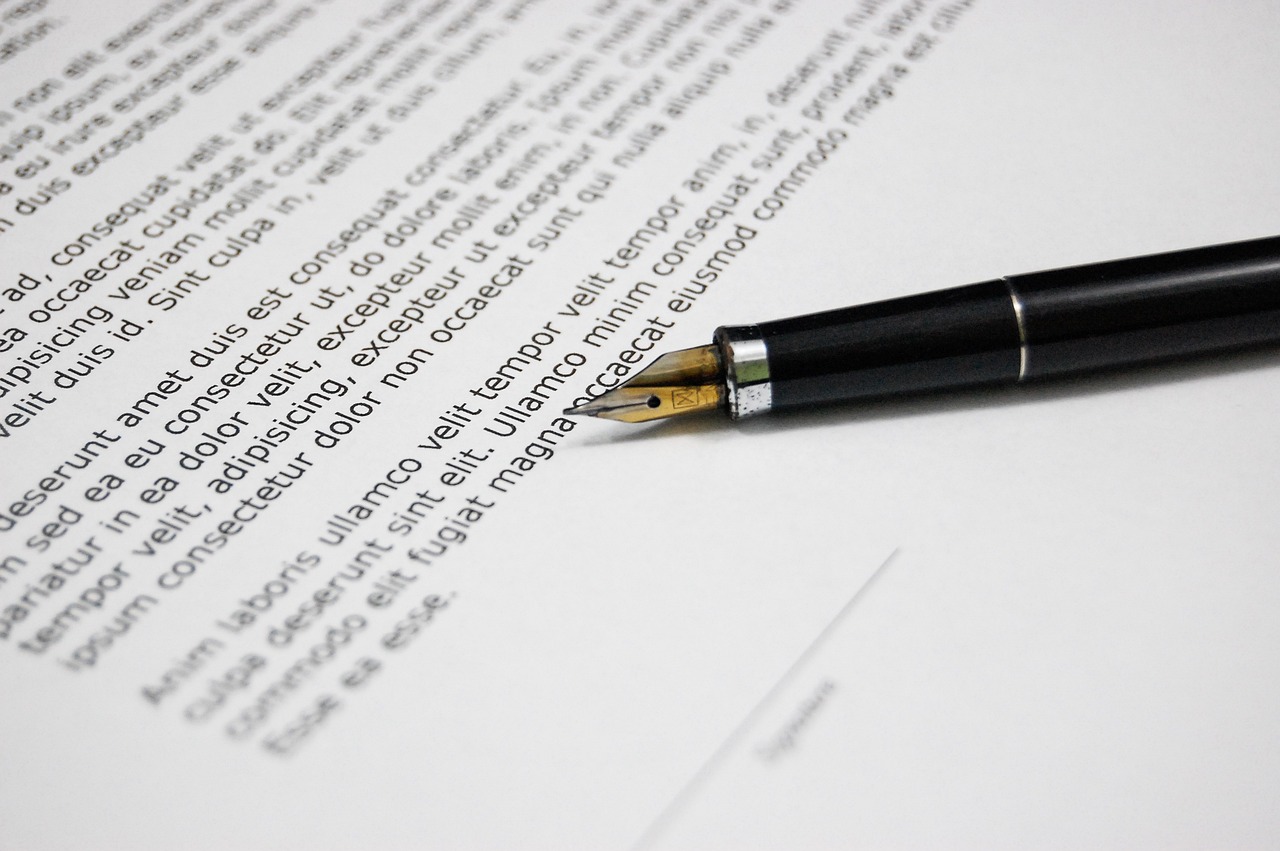
Before you can effectively communicate with your insurance company, it's crucial to familiarize yourself with your insurance policy. This document is your safety net, and understanding its key terms and coverage details can significantly impact your claims process. For instance, knowing whether your policy includes replacement cost coverage or actual cash value can make a huge difference in the compensation you receive. Take the time to read through your policy, highlighting sections that outline coverage limits, exclusions, and the claims process. If you find any jargon that feels like a riddle, don't hesitate to reach out to your agent for clarification. Remember, knowledge is power, especially when it comes to protecting your interests.
Accurate documentation of damage is vital for a successful claim. Think of your documentation as the foundation of your claim; without it, your case might crumble. Start by taking comprehensive photos of the damage. Capture various angles, ensuring you include close-ups of specific issues. Good lighting can make a world of difference, so try to take photos during the day when natural light is abundant. Additionally, create a list of all damaged items, including their age and value. This record will not only help you remember what was lost but also serve as a crucial piece of evidence for your adjuster.
When it comes to taking effective photos, there are a few tips that can elevate your documentation from good to great. Make sure to:
- Use a high-resolution camera or smartphone to ensure clarity.
- Capture wide shots to show the overall damage, as well as close-ups to highlight specific issues.
- Take photos before any repairs are made, as this will provide a clear record of the condition of your property.
- Include timestamps or date stamps on your photos to establish when the damage occurred.
By following these tips, you'll create a solid visual record that will support your claim and help your adjuster understand the extent of the damage.
Developing a thorough inventory of damaged items can strengthen your claim significantly. Consider using a simple template to list out your possessions. Here’s a basic structure you can follow:
| Item Description | Purchase Date | Estimated Value | Condition |
|---|---|---|---|
| Example Item 1 | MM/DD/YYYY | $XXX | Damaged |
| Example Item 2 | MM/DD/YYYY | $XXX | Damaged |
By organizing your inventory this way, you'll present a clear and concise summary of your losses to your insurance company.
Collecting repair estimates from contractors can substantiate your claim. It's essential to reach out to multiple contractors to get a range of estimates. This not only helps you understand the potential costs involved but also provides your insurance adjuster with concrete figures to work with. When you present these estimates, ensure they outline the scope of work, materials needed, and labor costs. This detailed information can help expedite your claim and ensure you receive fair compensation for repairs.
Navigating the claims process can be daunting, but knowing what to expect can ease a lot of stress. After filing your claim, your insurance company will assign an adjuster to assess the damage. This step is crucial, as the adjuster's report will heavily influence your payout. Be prepared for a series of communications, including follow-up questions from the adjuster. Staying informed and engaged during this process is essential. Keep a record of all correspondence and document any phone calls, noting dates, times, and the names of individuals you spoke with.
Effective communication with your insurance adjuster is critical. This individual is your primary point of contact, and establishing a good rapport can make a world of difference. Be clear about your needs and expectations, and don’t hesitate to ask questions. If something feels off or unclear, trust your instincts and seek clarification. A well-informed policyholder is a powerful advocate for themselves.
Preparation is key for the adjuster’s visit. Here’s a quick checklist of items to have ready:
- All documentation related to your claim, including photos and inventory lists.
- Repair estimates from contractors.
- Your insurance policy for reference.
- A list of questions you want to ask the adjuster.
Having these items on hand will ensure a smooth assessment and demonstrate your preparedness and seriousness about your claim.
After the initial assessment, follow-up is essential. Staying proactive and engaged with your insurance company can expedite your claim. Set reminders to check in regularly, and don’t hesitate to reach out if you haven’t heard back in a reasonable timeframe. A simple phone call or email can keep your claim moving forward and show your adjuster that you are serious about resolving the matter.
Q: How long does the claims process typically take?
A: The timeline can vary based on the complexity of the claim, but it generally takes anywhere from a few weeks to several months. Staying in touch with your adjuster can help speed things along.
Q: What should I do if my claim is denied?
A: If your claim is denied, review the denial letter carefully to understand the reasons. You can appeal the decision by providing additional documentation or evidence that supports your claim.
Q: Can I negotiate the settlement offer?
A: Yes, you can negotiate. If you believe the offer is too low based on your documentation, present your case to the insurance company with supporting evidence.

Understanding Your Policy
When disaster strikes, the last thing you want is to be left in the dark about your insurance policy. Understanding your policy is not just a good idea; it's absolutely essential. Think of your insurance policy as a roadmap to recovery—without it, you might find yourself lost and confused in a complicated claims process. So, let’s break it down together!
First off, familiarize yourself with the key terms in your policy. You might come across words like deductible, coverage limits, and exclusions. Each of these plays a crucial role in determining what you're entitled to after a disaster. For instance, the deductible is the amount you must pay out of pocket before your insurance kicks in. If you have a high deductible, you’ll need to plan accordingly, as it can affect your overall compensation.
Next, take a closer look at your coverage details. Policies can vary significantly, so it’s important to know what types of disasters are covered. Are you protected against floods, earthquakes, or fire? Or are there specific exclusions that could leave you vulnerable? Understanding these nuances can save you from unpleasant surprises when you file your claim.
Here’s a quick breakdown of common coverage types you might find in your policy:
- Dwelling Coverage: This covers the physical structure of your home.
- Personal Property Coverage: This protects your belongings, such as furniture and electronics.
- Liability Coverage: This can protect you if someone is injured on your property.
- Additional Living Expenses: This helps cover costs if you need to live elsewhere while your home is repaired.
It’s also important to know how your policy handles replacement cost versus actual cash value. Replacement cost means your insurance will cover the cost to replace an item without factoring in depreciation, while actual cash value takes depreciation into account. This distinction can significantly impact your payout, so be sure to clarify this with your insurance provider.
Lastly, don’t hesitate to reach out to your insurance agent or company for clarification on any points that seem confusing. After all, they’re there to help you navigate through this process. Keeping the lines of communication open can make a world of difference when you’re trying to understand your policy and what it covers. Remember, knowledge is power, especially when it comes to ensuring you get the compensation you deserve.
To wrap things up, here are some frequently asked questions regarding understanding your insurance policy:
- What should I do if I can't find my policy documents? Contact your insurance company immediately; they can provide you with a copy.
- Can I change my policy after a disaster? Generally, you can make changes, but it’s best to do so before a disaster occurs.
- How often should I review my policy? It’s wise to review your policy annually or after any major life changes.
Documenting the Damage
When disaster strikes, the aftermath can be overwhelming, but one of the most critical steps you can take is to meticulously document the damage. This isn’t just about taking a few snapshots; it’s about creating a comprehensive record that will support your insurance claim and ensure you receive the compensation you deserve. Think of your documentation as a storybook of what happened, complete with vivid illustrations and detailed descriptions that convey the extent of your losses.
First and foremost, taking effective photos is essential. You want to capture the damage in a way that tells a clear story. Don’t just snap a picture from one angle and call it a day. Instead, consider the following tips:
- Angles Matter: Take photos from multiple angles to provide a full view of the damage. This helps convey the severity and scope of the issue.
- Lighting is Key: Natural light works best, so try to document the damage during the day. Avoid shadows that could obscure details.
- Include Context: Capture images that show the damage in relation to undamaged areas. This contrast can be powerful in illustrating the impact of the disaster.
Next, you should create a detailed inventory of your damaged items. This isn’t just a list; it’s a crucial part of your claim. Think of it as a treasure map that guides the insurance company through your losses. Each item should be described with as much detail as possible, including:
- Item Description: What was it? (e.g., furniture, electronics, clothing)
- Purchase Date: When did you buy it?
- Original Cost: How much did you pay?
- Replacement Cost: What would it cost to replace it now?
To help you get started, here’s a simple template you can use for your damage inventory:
| Item Description | Purchase Date | Original Cost | Replacement Cost |
|---|---|---|---|
| Living Room Sofa | 01/15/2020 | $800 | $900 |
| 42-Inch TV | 06/10/2019 | $600 | $700 |
| Dining Table | 03/05/2018 | $400 | $500 |
Additionally, gathering repair estimates is crucial. This not only substantiates your claim but also shows the insurance company that you are serious about restoring your home. Contact reputable contractors to get estimates for the repairs needed. Make sure to keep a written record of these estimates, as they will serve as powerful evidence of the costs involved in restoring your property to its pre-disaster condition.
In summary, documenting the damage is not just a task to check off your list; it’s a vital process that sets the stage for your insurance claim. By taking effective photos, creating a thorough inventory, and gathering repair estimates, you’ll be well on your way to ensuring that your insurance company understands the full extent of your losses. Remember, the more detailed and organized your documentation, the stronger your claim will be.
Q: How many photos should I take of the damage?
A: There’s no set number, but the more comprehensive your documentation, the better. Aim for at least 10-15 clear photos from various angles.
Q: What if I don’t remember the purchase date of an item?
A: If you can’t recall the exact date, provide an approximate date and any receipts or bank statements that can help verify the purchase.
Q: How do I find contractors for repair estimates?
A: Look for local contractors with good reviews online, or ask friends and family for recommendations. Always get multiple estimates to compare.

Taking Effective Photos
When it comes to documenting damage after a disaster, can make all the difference in your insurance claims process. Think of your photos as the evidence that tells the story of what happened. You want to capture not just the big picture but also the little details that can help paint a clearer image for your insurance adjuster. Here are some tips to ensure your photos are as effective as possible:
First, consider the angles you choose. Stand at different points around the damaged area to get a comprehensive view. For example, if your roof has been damaged, take photos from the ground and from an angle that shows the extent of the damage. Don't just focus on the obvious; also capture the surrounding areas that might have been affected. This can include walls, floors, and any other structures that may have incurred damage.
Next, lighting plays a crucial role in how your photos turn out. Natural light is your best friend, so try to take pictures during the day when the sun is shining. If you're photographing interior damage, open curtains or turn on lights to ensure everything is well-lit. A well-lit photo can reveal details that might be missed in shadows, making it easier for your adjuster to assess the situation.
Moreover, don’t forget to include contextual images. These are photos that show the damage in relation to undamaged items or areas. For instance, if a water leak has affected your living room, take a picture of the entire room to show how the water damage compares to the rest of the space. This helps the adjuster understand the severity of the situation and how it impacts your overall living conditions.
Finally, consider taking videos in addition to photos. A quick walkthrough video can provide a 360-degree view of the damage, capturing details that static images might miss. Make sure to narrate what you’re showing in the video, explaining the issues as you go along. This can add a personal touch and further clarify the extent of the damage.
In summary, effective documentation through photography is about more than just snapping a few pictures. It’s about telling a complete story that will help your insurance company understand your situation. Remember to:
- Use multiple angles
- Ensure proper lighting
- Include contextual images
- Consider adding videos for a more comprehensive view
By following these tips, you’ll be well on your way to creating a solid visual record that can support your claim and help you get the compensation you deserve.
Q: How many photos should I take of the damage?
A: It’s better to take more photos than you think you need. Aim for at least 20-30 images from various angles and distances to provide a comprehensive view of the damage.
Q: Should I edit my photos before submitting them?
A: No, avoid editing your photos. Insurance companies need to see the original images to assess the damage accurately. Cropping is acceptable, but avoid filters or enhancements.
Q: Can I use my smartphone to take these photos?
A: Absolutely! Modern smartphones have excellent cameras that can capture high-quality images. Just make sure to follow the tips mentioned above for the best results.

Creating a Damage Inventory
When disaster strikes, the aftermath can feel overwhelming. One of the most crucial steps you can take in the claims process is creating a detailed damage inventory. Think of it as your personal treasure map, guiding you through the maze of insurance claims and ensuring you don't miss any valuable items that deserve compensation. A comprehensive inventory not only helps you remember what was lost but also serves as solid evidence to support your claim.
To start, gather your thoughts and take a deep breath. It might feel like a daunting task, but breaking it down into manageable steps can make it easier. Begin by walking through your home or property and taking note of everything that has been damaged. This includes not just large items like furniture and appliances but also smaller items like electronics, clothing, and personal belongings. Remember, even the little things can add up!
As you document each item, consider the following key details:
- Item Description: Provide a clear description of each item, including brand, model, and any unique features.
- Purchase Date: If possible, include when you purchased the item. This helps establish its value.
- Original Cost: Document how much you paid for the item. Receipts are ideal, but if you don’t have them, online searches can help you find approximate values.
- Current Condition: Note the extent of the damage. Is it completely destroyed, or can it be repaired?
Creating a table can also help organize this information clearly. Here’s a simple template you can use:
| Item Description | Purchase Date | Original Cost | Current Condition |
|---|---|---|---|
| Example Item 1 | MM/DD/YYYY | $XXX.XX | Damaged/Destroyed |
| Example Item 2 | MM/DD/YYYY | $XXX.XX | Damaged/Repairable |
Once you have your inventory compiled, it’s time to take it a step further. Pair your written documentation with photographic evidence. Take clear, well-lit photos of each item, showing the damage as well as the item itself. This visual proof can be incredibly persuasive when negotiating with your insurance company.
Finally, remember that keeping your inventory updated is essential. If you replace any items or acquire new possessions, add them to your list. This ongoing documentation will not only help during the claims process but will also serve as a valuable resource for future reference. After all, you never know when disaster might strike again, and being prepared can make all the difference.

Gathering Repair Estimates
When it comes to dealing with insurance companies after a disaster, one of the most crucial steps you can take is . These estimates serve as tangible proof of the costs associated with restoring your property, and they can significantly strengthen your claim. But how do you go about collecting these estimates effectively? Let’s break it down.
First, it’s essential to understand that not all estimates are created equal. You want to ensure that you’re getting quotes from reputable contractors who are licensed and insured. This not only adds credibility to your estimates but also gives you peace of mind knowing that the work will be done correctly. Start by asking for recommendations from friends, family, or neighbors who have had similar work done. You can also check online reviews to find trustworthy professionals.
Once you have a list of potential contractors, reach out to them for estimates. When speaking with them, be clear about the scope of the damage and the repairs needed. You might want to provide them with a detailed description or even photos of the damage to facilitate an accurate estimate. Most contractors will appreciate this level of detail, as it saves time and helps avoid misunderstandings later.
After receiving the estimates, it’s wise to compare them carefully. Look for any significant discrepancies in pricing or the scope of work proposed. A table can be useful here to visualize the differences. Here’s a simple example:
| Contractor | Estimated Cost | Scope of Work | Timeline |
|---|---|---|---|
| ABC Repairs | $5,000 | Roof replacement, interior drywall | 2 weeks |
| XYZ Construction | $4,500 | Roof replacement only | 1 week |
| 123 Home Services | $5,500 | Roof and interior repairs | 3 weeks |
In this table, you can easily see which contractor offers the best value for the work you need done. Remember, the lowest price isn’t always the best choice. Consider the scope of work and the timeline, as these factors can greatly impact your recovery process.
Once you’ve selected a contractor, make sure to request a detailed written estimate that outlines all the work to be done, the materials to be used, and the total cost. This document will be invaluable when submitting your claim to the insurance company. Additionally, keep communication lines open with your contractor throughout the process. This ensures that any unexpected issues can be addressed promptly and that you stay informed about the progress of the repairs.
In summary, gathering repair estimates is not just about getting numbers; it’s about building a solid foundation for your claim. By choosing reputable contractors, comparing estimates carefully, and maintaining clear communication, you can navigate this part of the process with confidence. Remember, your goal is to ensure that the repairs are done correctly and that your home is restored to its former glory.
- How many estimates should I gather? It's a good idea to get at least three estimates to ensure you're getting a fair price.
- What should I look for in a contractor? Look for licensed and insured contractors with good reviews and a solid reputation in your community.
- Can I negotiate the estimates? Yes, you can discuss the estimates with contractors and see if there’s room for negotiation, especially if you have competing quotes.
- What if the insurance company disputes the estimates? If that happens, provide detailed documentation and be prepared to discuss the estimates with your adjuster.

Understanding the Claims Process
When disaster strikes, the aftermath can feel like a whirlwind of chaos and confusion, especially when it comes to dealing with your insurance company. Navigating the claims process can often seem daunting, but understanding the steps involved can empower you to tackle it head-on. First and foremost, it’s essential to recognize that the claims process typically unfolds in several stages, each designed to help you recover your losses efficiently.
Initially, after you've reported your claim, your insurance company will assign an adjuster to your case. This person is your go-to for all things related to your claim. They will review your policy, assess the damage, and determine how much compensation you are entitled to. It’s crucial to maintain a good line of communication with your adjuster; think of them as your guide through this complex maze. You wouldn’t want to get lost, right?
Next, the adjuster will schedule a visit to your property to conduct a thorough assessment. This is where your preparation from the previous sections really pays off. Having all your documentation ready, including photos and repair estimates, will help the adjuster understand the full scope of the damage. Remember: the clearer you are about your situation, the easier it will be for them to advocate for you and your needs.
Once the assessment is complete, the adjuster will compile a report and submit it to the insurance company. This is where the waiting game begins. Depending on the complexity of your claim, this process can take anywhere from a few days to several weeks. Patience is vital here, but don’t let it turn into passivity. Follow up regularly to check on the status of your claim. A proactive approach can significantly expedite the process.
After the company reviews the adjuster’s report, they will make a decision on your claim. They will either approve it, deny it, or request additional information. If your claim is approved, you’ll receive an offer that outlines the compensation you are eligible for. At this stage, it’s important to thoroughly review the offer. If it seems low or doesn’t cover your losses adequately, don’t hesitate to negotiate. Be prepared to present your evidence and argue your case. Remember, this is your recovery on the line!
In summary, understanding the claims process is about being informed and prepared. Here’s a brief overview of the steps you can expect:
| Step | Description |
|---|---|
| 1. Claim Reporting | Notify your insurance company about the disaster and file your claim. |
| 2. Adjuster Assignment | Your insurance company assigns an adjuster to evaluate your claim. |
| 3. Damage Assessment | The adjuster visits your property to assess the damage. |
| 4. Claim Review | The insurance company reviews the adjuster’s report and makes a decision. |
| 5. Settlement Offer | You receive an offer for compensation, which you can negotiate if necessary. |
By understanding these stages, you can navigate the claims process with greater confidence and clarity. Remember, you are not alone in this journey. Your insurance company is there to help you, and staying informed is your best strategy for ensuring you get the compensation you deserve.
1. How long does the claims process typically take?
The duration can vary widely depending on the complexity of your claim, but most claims are resolved within a few weeks to a couple of months.
2. What should I do if my claim is denied?
If your claim is denied, don’t panic. Review the denial letter carefully, gather additional evidence, and consider appealing the decision. You may also want to consult with an attorney if necessary.
3. Can I negotiate my settlement offer?
Absolutely! If you believe the offer is insufficient, prepare your documentation and negotiate with your insurance company.
4. What happens if I find more damage after filing my claim?
If you discover additional damage, report it to your insurance company as soon as possible. They may reopen your claim or issue an additional payment based on the new information.

Communicating with Your Adjuster
When it comes to dealing with insurance claims, effective communication with your insurance adjuster can make all the difference. Think of your adjuster as your ally in the claims process; they are there to help you navigate the often murky waters of insurance policies and compensation. However, just like any relationship, it’s crucial to establish clear lines of communication to ensure that your needs are understood and addressed.
First and foremost, be prepared. Before you even pick up the phone or meet in person, gather all relevant documents, notes, and photos that detail the damage. This preparation not only shows that you are serious about your claim but also helps your adjuster understand your situation better. When you present your case clearly, it increases the likelihood that your adjuster will advocate for you effectively.
Next, don't hesitate to express your needs and concerns. If something is unclear in the process, ask questions. Here’s where a little assertiveness goes a long way. You might say something like, “I’m not sure I understand how my policy applies to this situation. Can you explain it to me?” This not only clarifies the process but also shows your adjuster that you are engaged and informed.
As you communicate, remember to document everything. Keep a detailed record of all conversations, including dates, times, and the names of the people you spoke with. This can be invaluable if disputes arise later. You might even consider creating a simple table to track your communications:
| Date | Contact Name | Summary of Conversation |
|---|---|---|
| MM/DD/YYYY | John Doe | Discussed initial claim and next steps. |
| MM/DD/YYYY | Jane Smith | Clarified coverage details regarding water damage. |
Another key aspect of communication is staying polite yet firm. Insurance claims can be frustrating, but remember that your adjuster is more likely to help you if you maintain a respectful tone. You can express urgency without being aggressive. For instance, instead of saying, “I need this done now!” you could say, “I appreciate your help and would like to understand how we can expedite this process.”
Lastly, don’t forget to follow up regularly. If you haven’t heard back in a reasonable timeframe, a gentle reminder can go a long way. A quick email or phone call can keep your claim on their radar. You might say, “I wanted to check in regarding my claim status. Is there anything further you need from me?”
By mastering the art of communication, you’ll not only make the claims process smoother but also increase your chances of receiving the compensation you deserve. It’s all about building a collaborative relationship with your adjuster, where both parties feel heard and valued.
- What should I do if my adjuster is unresponsive? If your adjuster is unresponsive, try reaching out via multiple channels (email, phone, etc.) and document your attempts. If issues persist, consider escalating the matter to a supervisor.
- How can I ensure my claim is processed quickly? Provide all necessary documentation promptly, keep communication lines open, and follow up regularly to keep your claim moving.
- What if I disagree with the adjuster’s assessment? If you disagree, gather additional evidence (photos, repair estimates) and discuss your concerns with your adjuster. You can also request a second opinion from another adjuster.

Preparing for the Adjuster Visit
When it comes to dealing with insurance claims after a disaster, one of the most pivotal moments is the visit from your insurance adjuster. This is your chance to present your case, so preparation is key. Think of it like preparing for a job interview—first impressions matter! You want to ensure that you make the most of this opportunity to convey the extent of your losses clearly and effectively.
Start by gathering all relevant documentation. This includes your insurance policy, any previous correspondence with the insurance company, and a detailed inventory of damaged items. Having these documents at your fingertips will not only help you feel more confident but will also demonstrate to the adjuster that you are organized and serious about your claim. You might also want to prepare a summary sheet that outlines the main points you want to discuss, including key damages and any repair estimates you’ve collected.
Next, consider the physical space where the adjuster will be assessing the damage. If possible, tidy up the area to make it easier for them to see the full extent of the damage. Clutter can distract from the issues at hand, and you want the focus to be on your losses. If there are specific areas of concern, make sure to highlight them. You can even use sticky notes or markers to draw attention to critical spots, kind of like a treasure map leading them to the ‘X’ that marks the spot of your losses.
Another important aspect of preparation is to have a list of questions ready. This could include inquiries about the claims process, timelines, and what documentation they will need from you moving forward. Engaging in a dialogue with the adjuster not only shows that you are invested in the process, but it can also clarify any uncertainties you might have. Here are a few questions you might consider asking:
- What is the next step in the claims process?
- How long can I expect the claim to take?
- What additional information do you need from me?
Finally, remember to stay calm and composed during the adjuster’s visit. It’s natural to feel overwhelmed after a disaster, but keeping a level head will help you communicate more effectively. If you feel anxious, take a deep breath and remind yourself that this is a collaborative process aimed at getting you the support you need.
In summary, preparing for the adjuster visit involves gathering documentation, organizing your space, preparing questions, and maintaining a calm demeanor. By taking these steps, you will set the stage for a productive meeting that can significantly impact the outcome of your claim.
Q: What should I do if I disagree with the adjuster's assessment?
A: If you feel the adjuster's assessment is unfair, you can request a second opinion or ask for a review of the claim. Gathering additional evidence, such as repair estimates from contractors, can also help support your case.
Q: How long does the claims process usually take?
A: The duration of the claims process can vary widely based on the complexity of the claim, the insurance company’s procedures, and local regulations. Generally, it can take anywhere from a few weeks to several months.
Q: Can I still file a claim if I didn't document the damage immediately?
A: Yes, you can still file a claim even if you didn't document the damage right away. However, having thorough documentation will strengthen your claim, so it’s best to gather as much evidence as possible as soon as you can.

Follow-Up Strategies
After the initial assessment by your insurance adjuster, the real work begins. It's not just about waiting; it's about actively engaging with your insurance company to ensure your claim progresses smoothly. Think of it like nurturing a plant: if you don't water it, it won't grow. Similarly, if you don't follow up, your claim might stall. Here are some effective strategies to keep the momentum going.
First and foremost, document everything. Keep a detailed record of all communications with your insurance company, including dates, times, and the names of the representatives you speak with. This not only helps you stay organized but also provides a clear timeline of your interactions, which can be invaluable if disputes arise later. Consider using a simple table format to track your communications:
| Date | Representative Name | Discussion Points | Next Steps |
|---|---|---|---|
| MM/DD/YYYY | John Doe | Initial Claim Discussion | Awaiting Adjuster Visit |
| MM/DD/YYYY | Jane Smith | Follow-Up on Repair Estimates | Submit Estimates |
Next, set reminders for yourself to follow up regularly. A good rule of thumb is to check in every week or two, depending on the complexity of your claim. When you call, be polite yet assertive. Start the conversation by stating your claim number and asking for an update. This shows that you are proactive and serious about your claim.
Additionally, don't hesitate to ask questions during your follow-up calls. Inquire about the status of your claim, any additional information they might need from you, and timelines for the next steps. This not only keeps you informed but also demonstrates your commitment to resolving the matter swiftly. If they mention any delays, ask for a clear explanation and what can be done to expedite the process.
Another effective strategy is to leverage social media or online platforms. Many insurance companies have dedicated teams that monitor their social media accounts. If you're not getting the response you need through traditional channels, consider sending a polite message or posting your concern publicly. Just remember to keep it professional—no one likes to be called out publicly, and you might find that this approach garners quicker results.
Finally, be prepared for potential delays and setbacks. The claims process can be unpredictable, and sometimes you'll need to be patient. However, patience doesn't mean being passive. Continue your follow-ups and stay engaged. If you feel your claim is being unjustly delayed, consider seeking help from a consumer advocacy group or a public adjuster who can assist you in navigating the complexities of your claim.
By employing these follow-up strategies, you’ll not only keep your claim on track but also ensure that you are advocating for the compensation you deserve. Remember, you're not just a policy number; you're a person with rights, and your voice matters throughout this process.
- How often should I follow up with my insurance company? It's advisable to follow up every week or two, depending on the complexity of your claim.
- What should I do if my claim is denied? Review the denial letter carefully, gather any additional documentation needed, and consider appealing the decision.
- Can I hire a public adjuster? Yes, hiring a public adjuster can help you navigate the claims process and advocate for your interests.
Frequently Asked Questions
- What should I do first after a disaster?
After a disaster strikes, your first step should be to ensure your safety and the safety of others around you. Once that's settled, start documenting the damage to your property. This includes taking photos and making a list of all affected items. This documentation will be crucial when filing your insurance claim.
- How do I understand my insurance policy better?
Understanding your insurance policy can feel like deciphering a foreign language. Start by reading through the policy documents carefully. Look for key terms like "deductible," "coverage limits," and "exclusions." If you're unsure about anything, don't hesitate to reach out to your insurance agent for clarification. They can help you understand what is covered and what isn’t.
- How can I document the damage effectively?
Effective documentation involves more than just snapping a few pictures. Make sure to take clear, well-lit photos from multiple angles. Create a detailed inventory of damaged items, including descriptions, purchase dates, and estimated values. This thorough approach will strengthen your claim and provide the necessary evidence to your insurance company.
- What should I include in my damage inventory?
Your damage inventory should include a comprehensive list of all affected items. For each item, note down its condition, estimated value, and any relevant receipts or proof of purchase. This could be as simple as a spreadsheet or a handwritten list, but the more detail you provide, the better your chances of a successful claim.
- How do I gather repair estimates?
To gather repair estimates, reach out to local contractors and ask for written estimates for the necessary repairs. Be sure to get at least three estimates to provide a range of costs. Presenting these estimates to your insurance company can help substantiate your claim and ensure you receive fair compensation.
- What can I expect during the claims process?
The claims process can vary depending on your insurance company, but generally, it involves filing your claim, having an adjuster assess the damage, and waiting for approval. Stay proactive by keeping in touch with your adjuster and providing any additional information they may need. Patience is key, but being engaged can help expedite the process.
- How should I communicate with my insurance adjuster?
Clear communication is essential when dealing with your insurance adjuster. Be honest and straightforward about your needs and the extent of the damage. Prepare any questions you have in advance and ensure you have all necessary documentation ready. This will help foster a productive dialogue and keep the process moving smoothly.
- What should I do to prepare for the adjuster's visit?
Preparation for the adjuster's visit can make a significant difference. Create a checklist that includes all your documentation, photos, and your damage inventory. Have any relevant questions ready to ask, and be open to discussing the details of your claim. A well-prepared presentation can help ensure a thorough assessment.
- Why is follow-up important after the initial assessment?
Follow-up is crucial because it keeps your claim on the radar of the insurance company. After the initial assessment, reach out to your adjuster to check on the status of your claim and provide any additional information they might need. Staying engaged shows that you are serious about your claim and can help speed up the process.


